Workspace settings explained
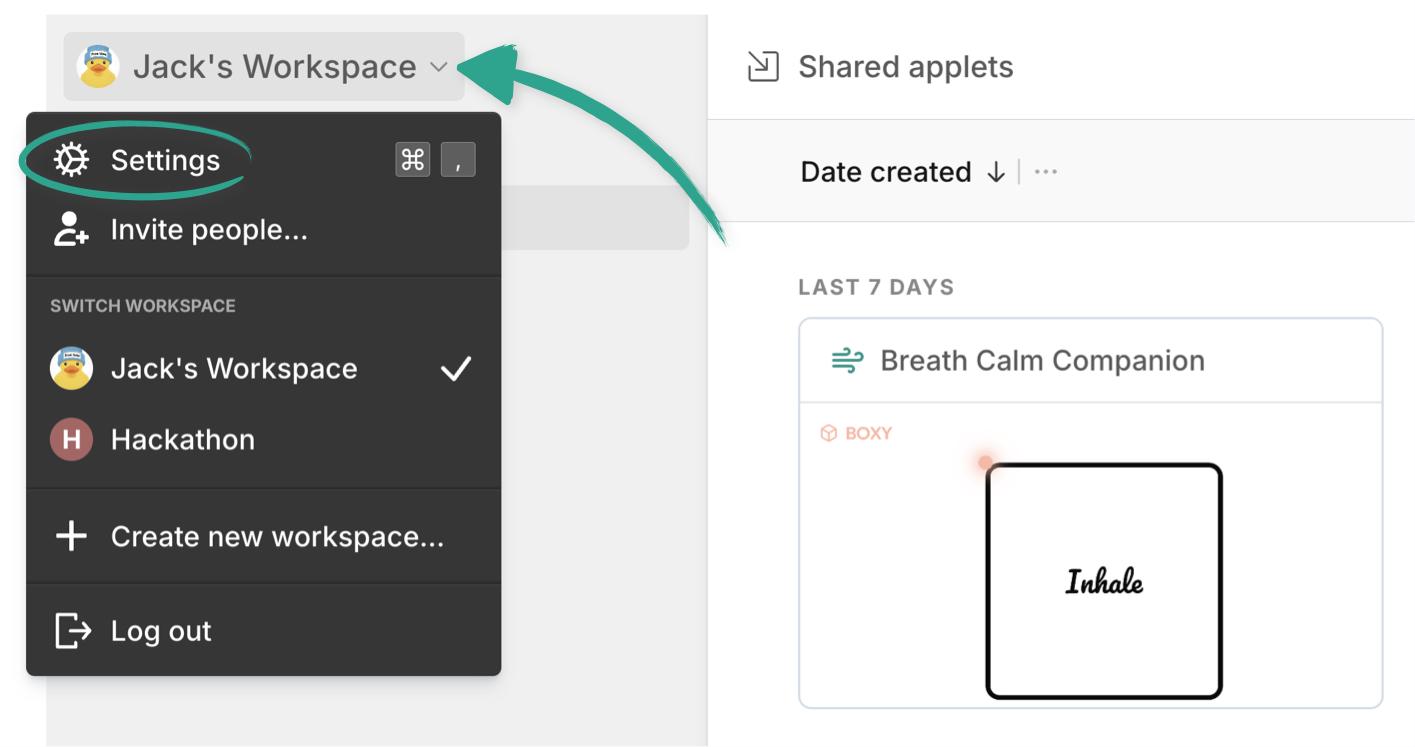
To change your workspace settings, click "Settings" under your workspace name in the top left:
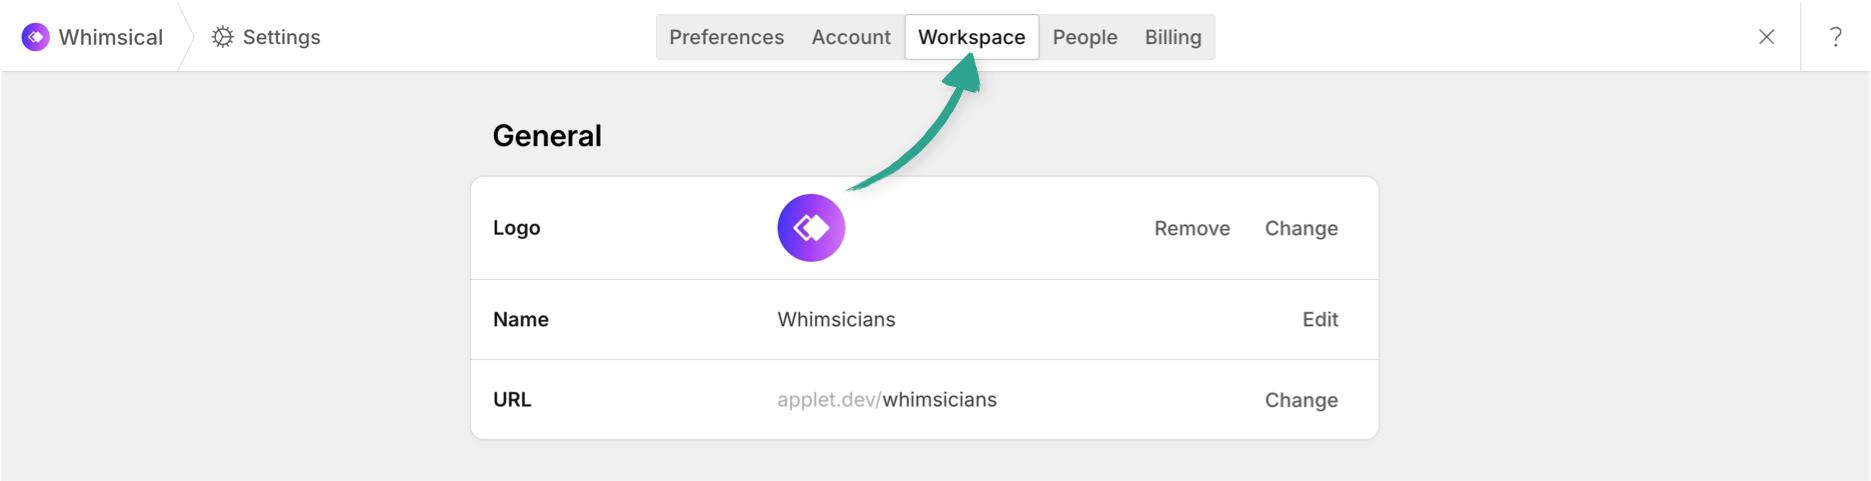
Or use the keyboard shortcut Command (or Ctrl) + , then go to the "Workspace" tab.
You can also get to any of the settings pages from the command menu with Command (or Ctrl) + K .
Here you’ll find the basic customization settings for your workspace, like name, logo and URL:
All changes made on these screens take effect automatically - no need to save them.
Security and access Copied! Link to this section
If you’ve signed up with your company email address (and not a public email address like gmail.com or aol.com) you’ll see the “Security and access” section.
This lets you link your domain, so anyone from your company can sign up without needing an invite. This makes it easier to collaborate with those on your team:
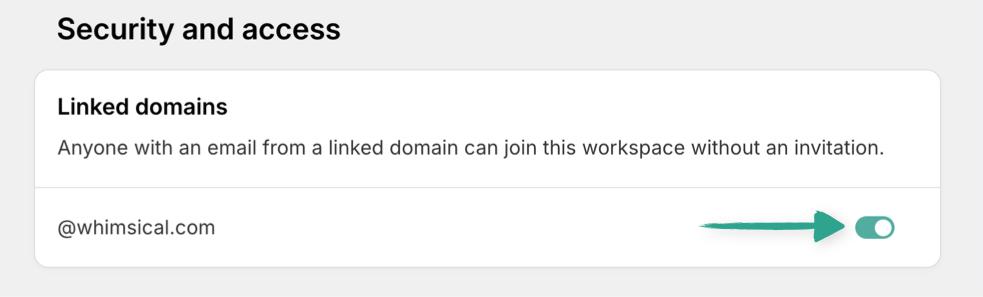
Enabling this setting will let new users that share your email domain join your workspace immediately (your IT team will thank you when your company has just one organized account 😉).
Once this setting is enabled for one workspace, the email domain cannot be linked to any other workspace. You can disable this at any time, if you need to switch it to a different workspace.
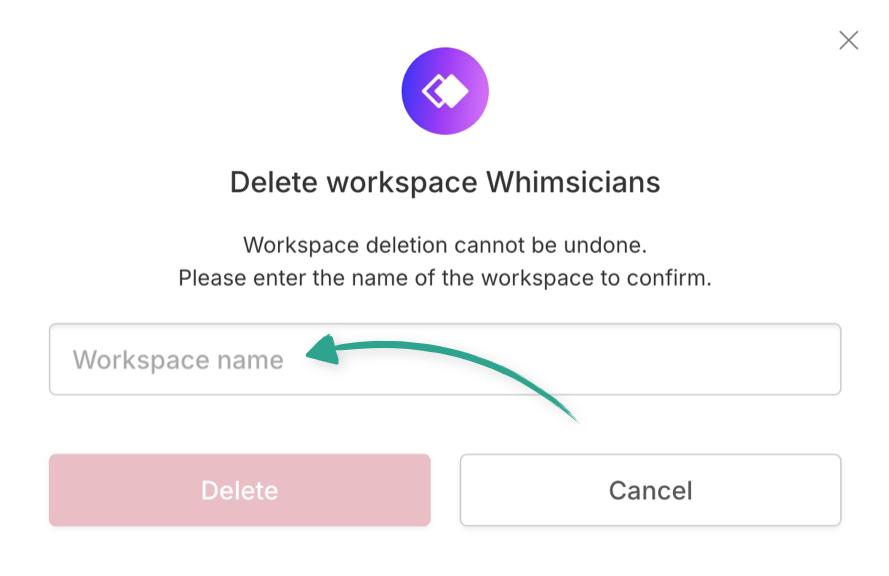
Danger zone Copied! Link to this section

This is where you can delete your workspace, and all of the applets it contains:

Important: This is irreversible, so you must be an admin, and will be required to confirm the action by typing in your workspace name:
Managing the people in your workspace Copied! Link to this section
First, switch to the people tab of your settings:
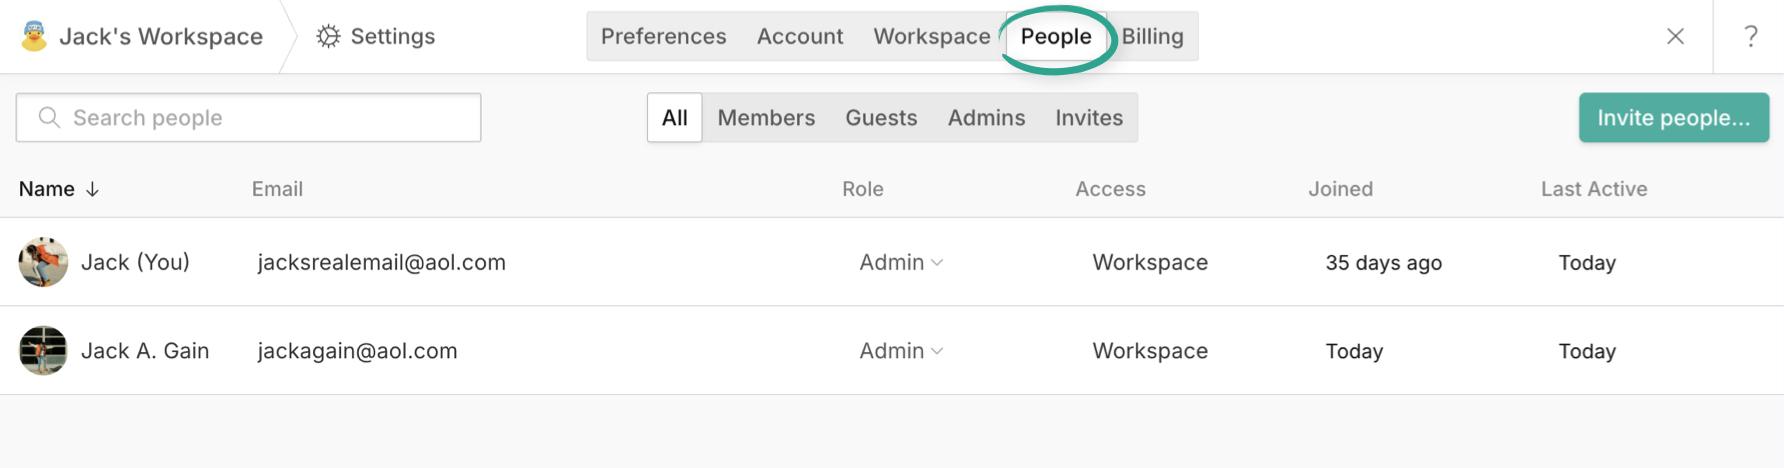
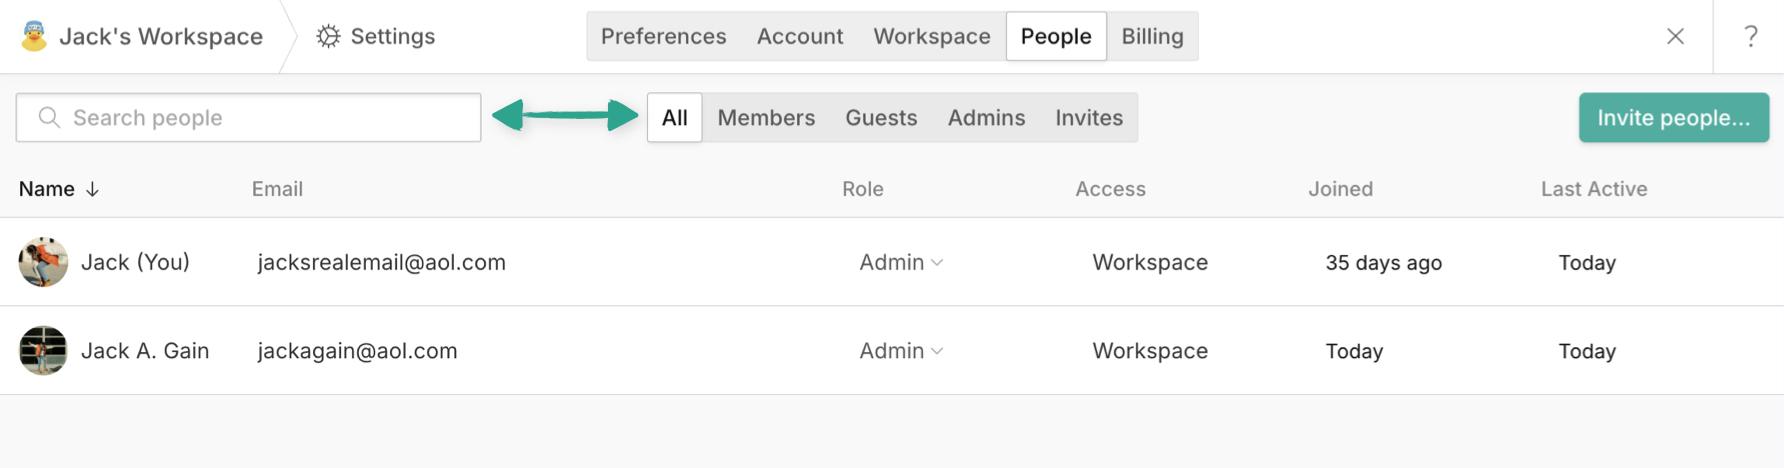
From here you can filter, or search (by name or email address) the list of people to find exactly who you’re looking for:
To revoke, or grant someone's admin access, click the dropdown next to their current role:

This is also where you can remove someone from your workspace entirely.
Inviting new members Copied! Link to this section
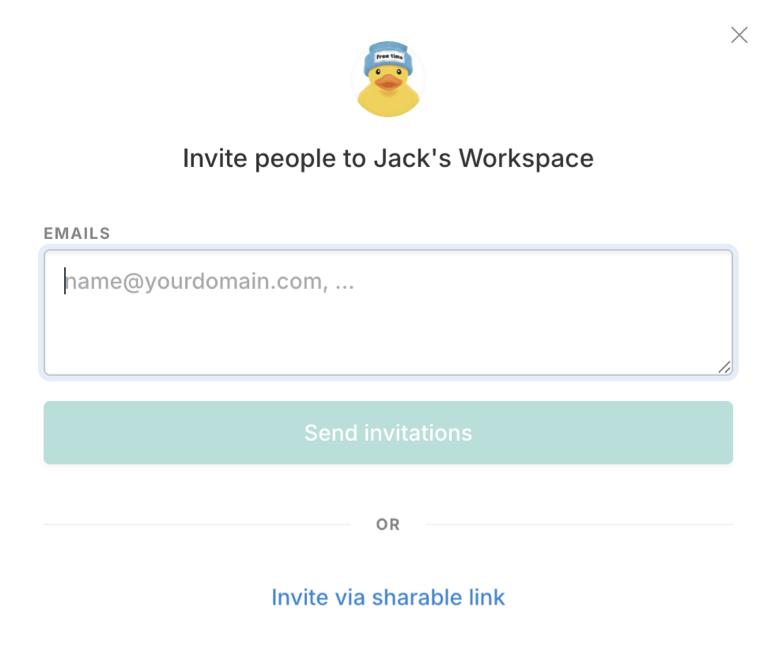
To invite people to your workspace click “Invite people...” in the top right corner:

From here you can enter their email address, or a list of email addresses (separated by commas) and they’ll be sent an invite link directly:
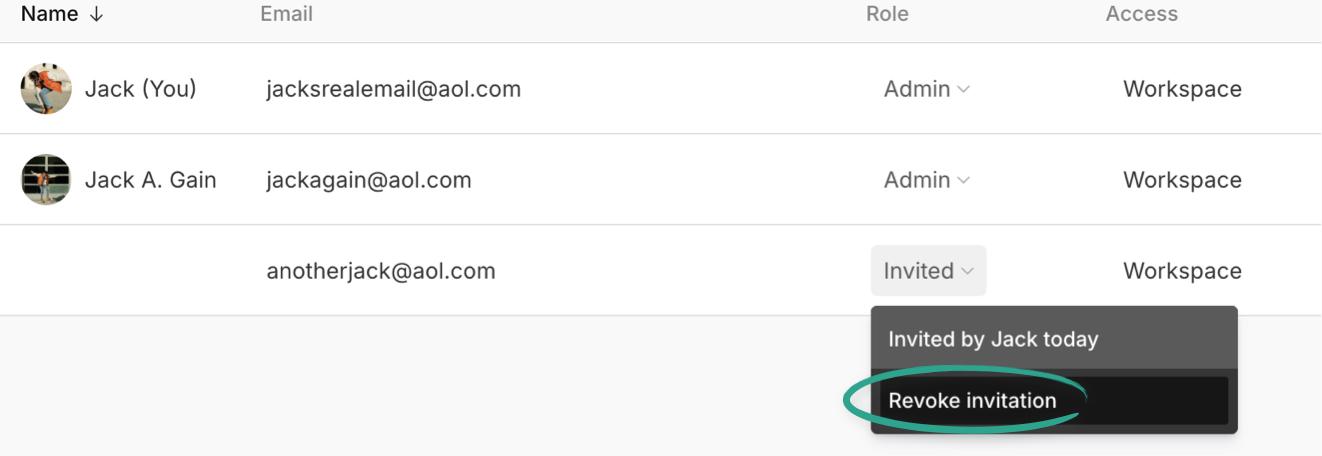
You can always see a list of pending invite emails from the invites tab on the people page.
To revoke the invitation, click the dropdown next to “invited” - this will also show you who sent the invite, and when.
Alternatively, you can invite people with a shareable link - just click “Invite via shareable link” then copy the link in the box and paste it wherever your team is - Discord, Slack etc.

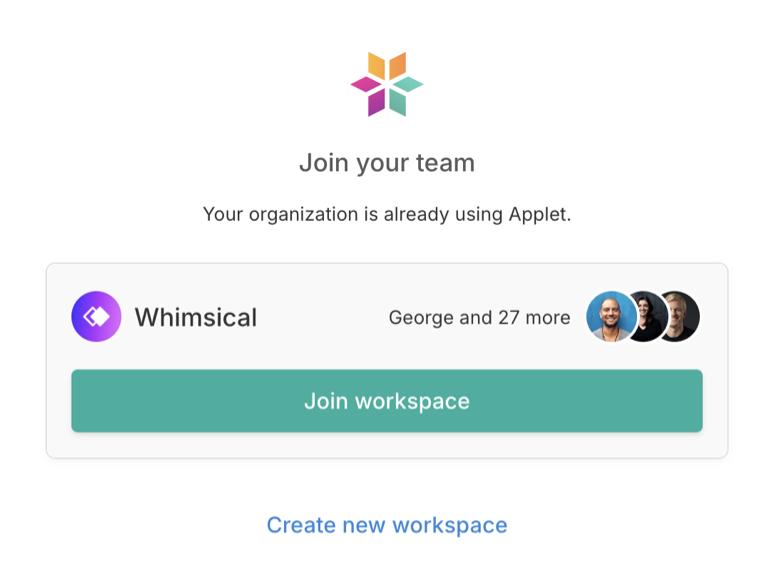
Anyone clicking this link can sign up for Applet, and will join your workspace immediately.